
Create your first image ad
Choose a product and angle or write a brief, then generate a small first batch.
Start with a saved product, accurate images and one clear angle. Have enough credits for the action and check that creative generation is available in your workspace.
Use the ad brief and review checklist before you generate and again when you review the result.
Watch the walkthrough
Read the walkthrough steps
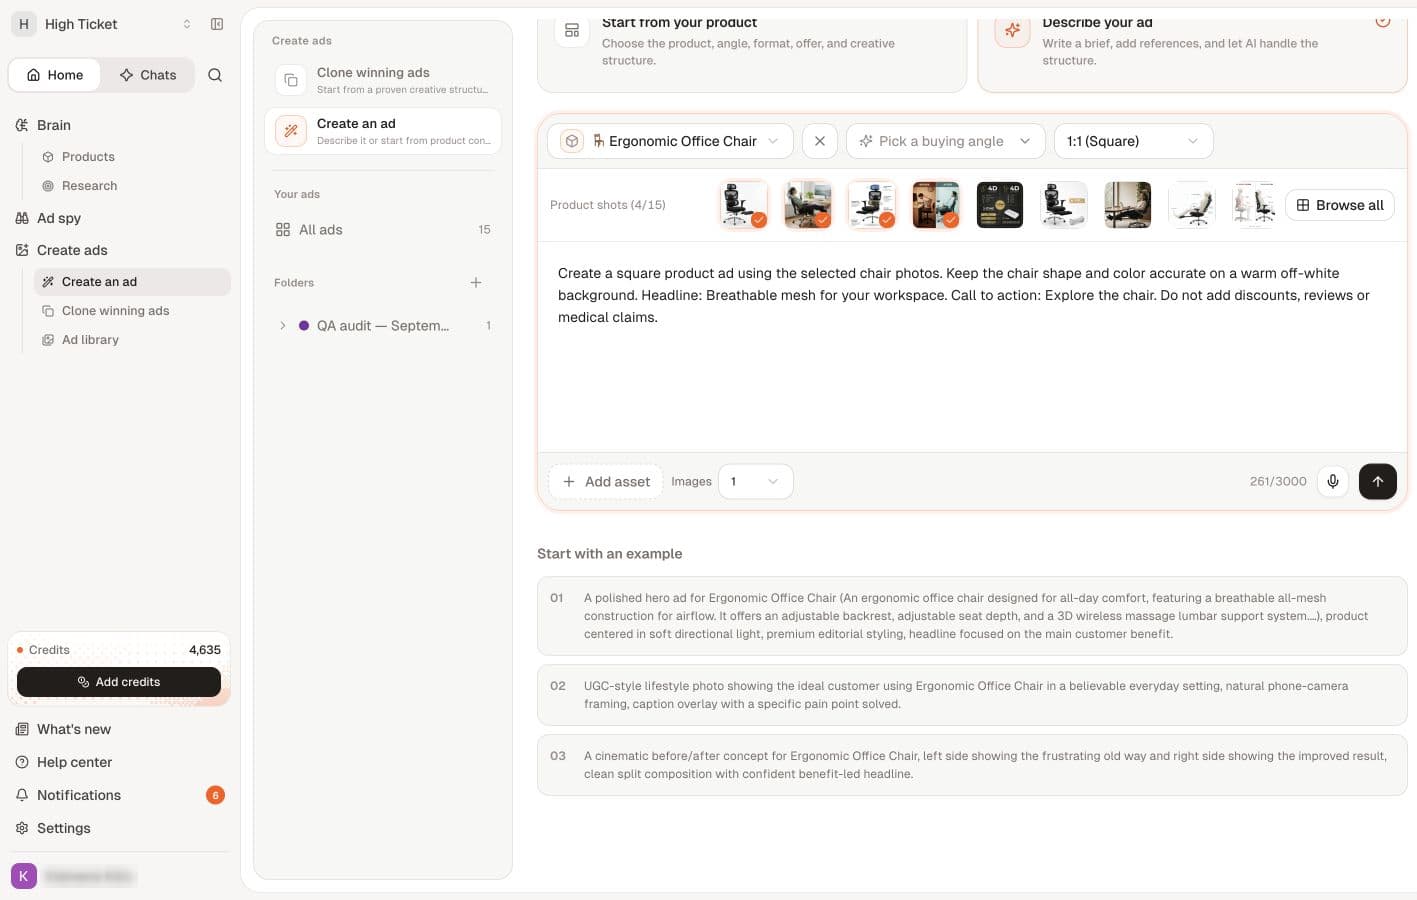
- Select your product and accurate photos.
- Write a focused brief. Start with one image; generation uses credits.
- Find the completed result in Ad library.
- Review the image and claims. Download when ready.
- Edit image creates a new version. Review it before exporting.
Choose a starting point
Open Create ads → Create an ad. You can also use Create ads from this angle on a buying angle. Check the selected product and angle when the screen opens.
Opening Image Ads without picking a screen sends you to the most useful place: a link from a product or angle opens Create an ad with those details filled in, a workspace that already has ads opens Ad library, and a workspace with none opens Clone winning ads.
The current screen offers two paths:
| Path | Use it when |
|---|---|
| Start from your product | You want to select the product, angle, style and offer in a structured form. |
| Describe your ad | You have a specific brief or want more control over the visual direction. |
Start from your product
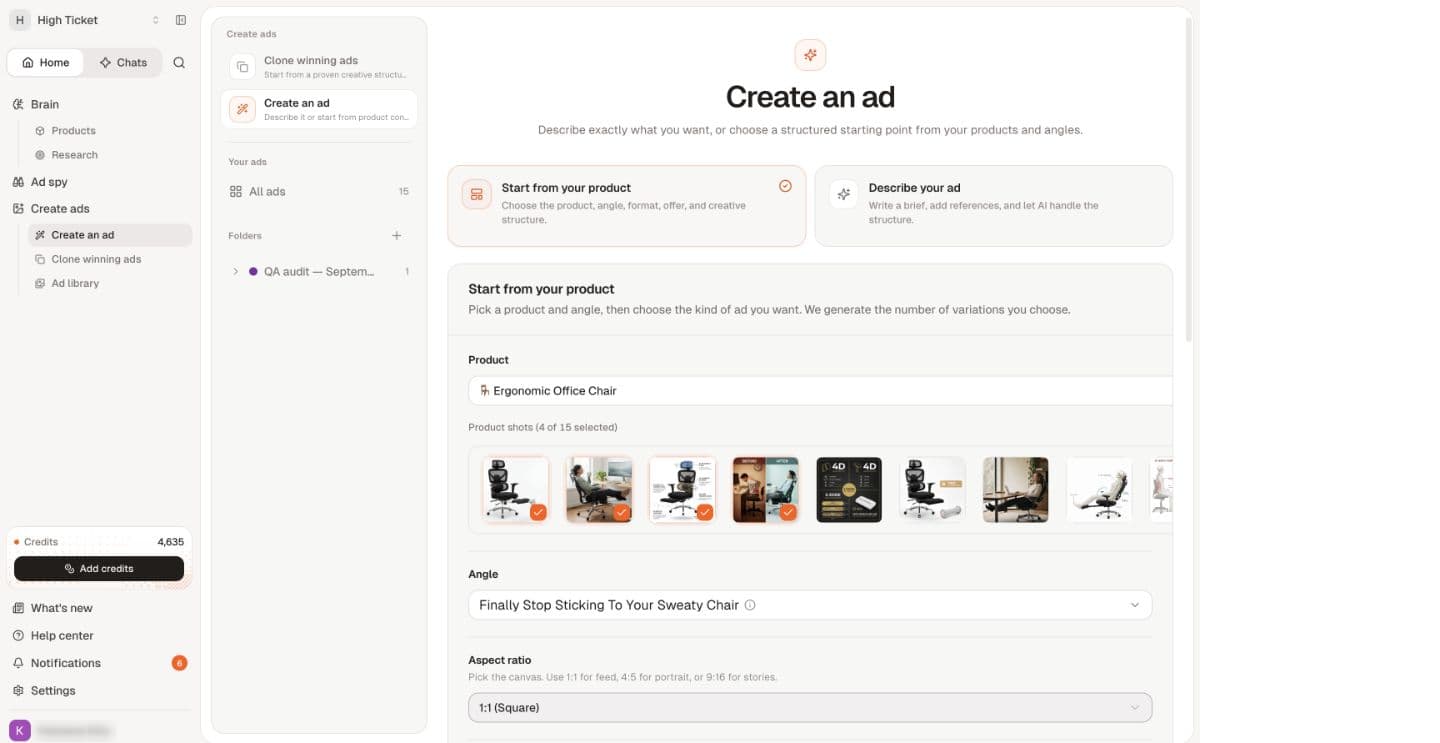
- Select the Product.
- Review the product shots. Four hero images are selected by default, and the picker says how many you can choose. A product with no hero images shows a note that ads will still generate without the actual product shot; add images first for a usable result.
- Choose the Angle you want to communicate.
- Choose an Aspect ratio appropriate to the placement: square, portrait or story-shaped.
- Under Ad style, select Let me pick and one or more styles, or Let AI pick for a balanced mix.
- Choose a genuine Offer, or keep No offer.
- Set the batch size, from one to five images. One image is enough to check the initial direction; it costs about 15 credits, and five cost about 73.
- Select Generate once and wait for the result. The button shows the number of ads and the estimated credits before you confirm, and work is charged on success only.
A style label is a creative structure, not permission to invent proof. Only use a testimonial, statistic, before-and-after result or comparison when the underlying claim is supported.
Describe your ad
- Select Describe your ad.
- Select the product and, when useful, a buying angle.
- Review the product shots and aspect ratio.
- Write the brief in Describe your ad. Include the visual, headline, call to action and anything that must stay accurate.
- Use Add asset when you have an appropriate reference to provide: up to 5 images, PNG, JPEG or WebP, 8 MB each. You can also drag images in or paste them. They are attached to that generation rather than added to the product's images.
- Choose the number of images, then select Generate ads once.
For example, adapt this brief to your own product:
Create a clean square ad using the selected product photos. Keep the shape and colors accurate. Use a warm off-white background and a simple composition. Headline: [your supported message]. Call to action: [your next step]. Do not add prices, discounts, reviews or performance claims that I have not supplied.
The current brief field shows a 3,000-character counter. Keep the instructions focused rather than filling the space.
Wait and open the result
The screen shows generation status and a Latest generation area, moving through Queued, Generating and Ready (or Needs attention if something failed). Use Open generation when the result is ready. You can keep editing the form while a job runs; that does not change the already submitted job.
If progress looks stuck, check the generation and Ad library before submitting again. Regenerate, Generate more and Rerun request more work; they are not refresh buttons and may use additional credits.
Finish the first pass
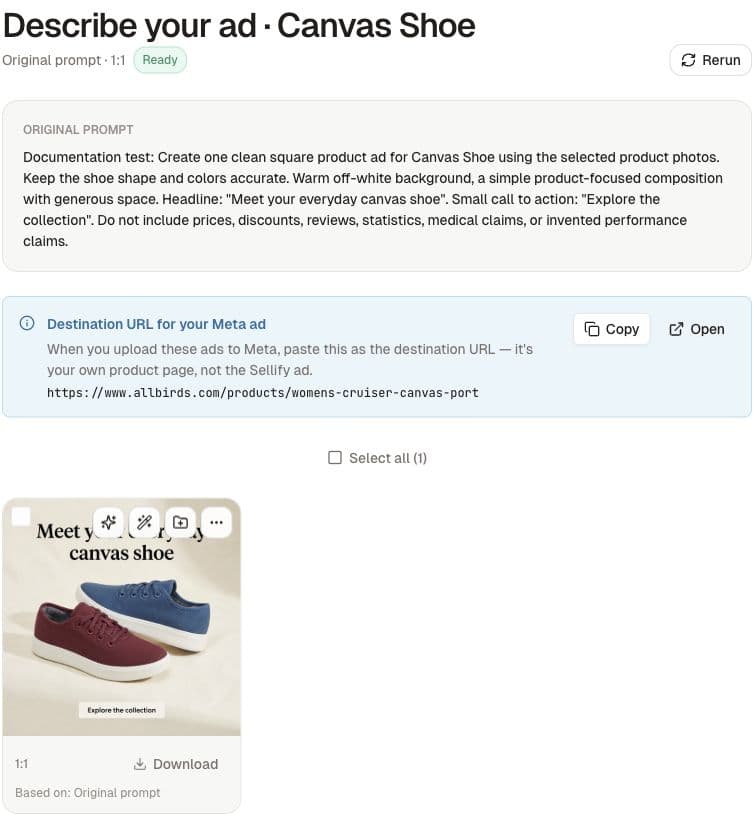
Review the image against your product photos and brief. Check the actual words in the image at a readable size. Then download and organize it.
The destination URL should be your product or landing page, not the Sellify generation page. Creating this asset does not launch a Meta campaign.
Related
Find, review and download your ads · Edit an ad · What's the difference between cloning and building an ad?